Its cold weather season! Time to whip out the home-made scarves and hats or start going through your yarn stash to make one!
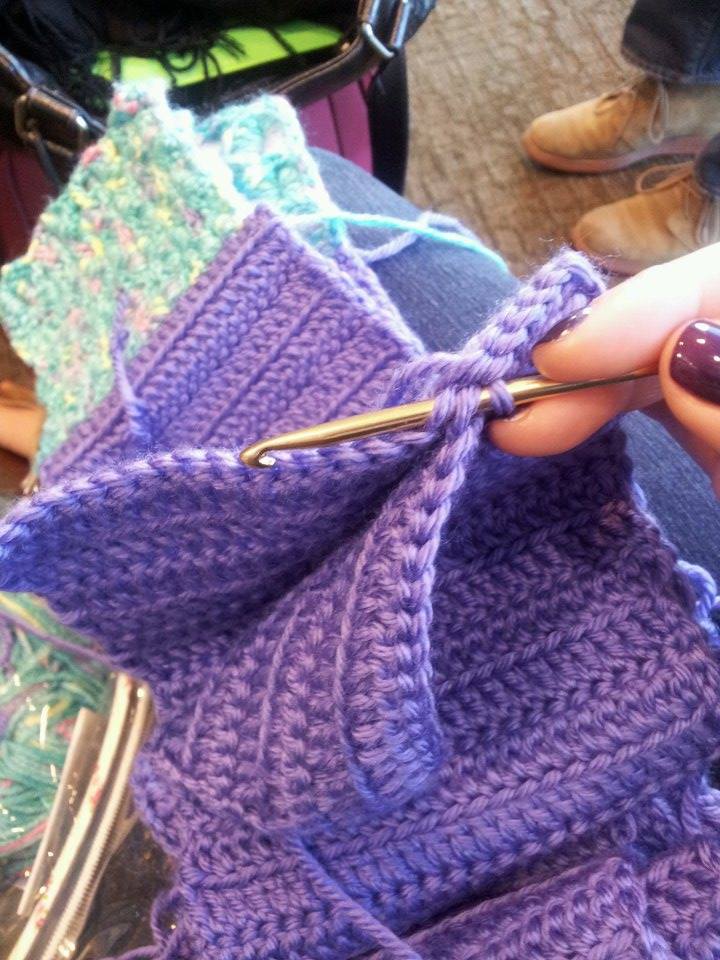
Any of you modern crocheters out there who have surfed crochet websites or searched for patterns on Etsy lately have become aware of the new “Crocodile Stich” trend. When I first saw the stitch online I thought it looked waaay too complicated for someone like me who is only intermediately skilled. I thought I’d give it a try, though, and bought a pattern from BonitaPatterns on http://www.etsy.com. (BonitaPatters has its own web site, http://www.bonitapatters.com, that you can buy directly from) To my surprise, I picked it up rather quickly. I’m a visual learner and appreciate clarity and simplicity. Her photos and instructions made it pretty easy to understand.
Now that I know how to do the Crocodile Stitch (named this because of the scale-like effect the yarn takes) I’ve been trying to come up with new ways to incorporate it into different projects. I like to add it as an accent to larger pieces or limit it to smaller projects because it does consume a lot of yarn and, although it is not difficult, it is a little more time consuming than basic stitches. (I’m a bit impatient like to move on to new projects rather quickly. I admit to getting bored if I don’t get the gratification of admiring my finished product after long.)
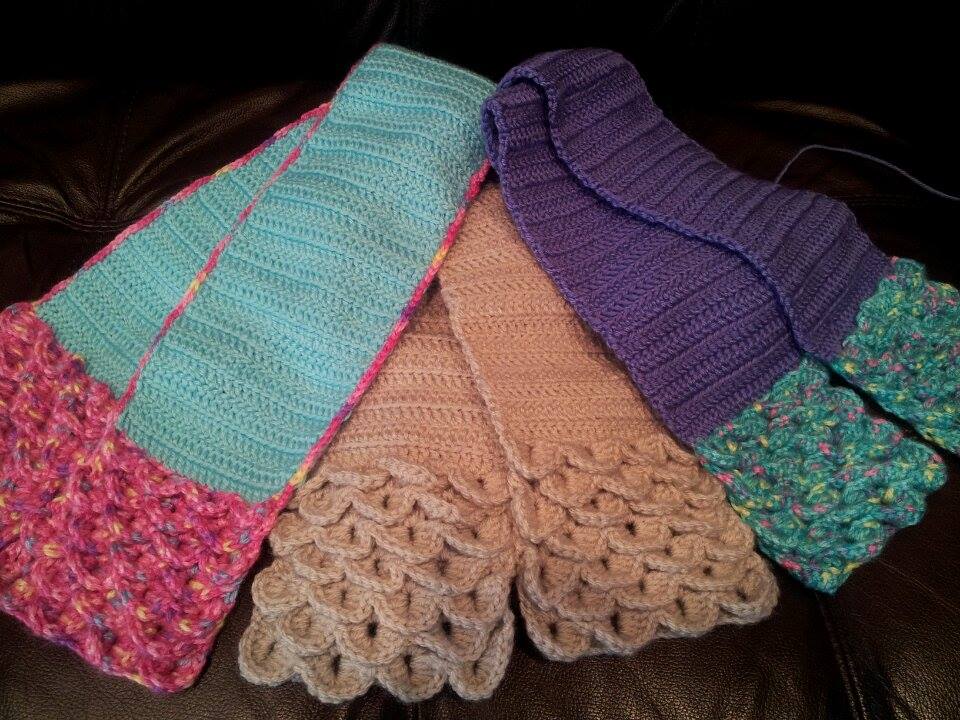
Here is a crocheted scarf I made for myself with Crocodile Stitch fringe on each end. This was made with Lion Brand, Vanna’s Choice in Linen. It took about 2 skeins of yarn and one leisurely week of working on it off and on.
Materials:
2 skeins of 4 ply yarn
Size G crochet Hook
Instructions:
1. Chain 24
2. Chain three in 4th chain from hook and V-stitch in every 3rd chain thereafter until you reach the end.
3. On this row of V-stitches (you should have 8 in total), create your first 4 “scales” of crocodile stitch.
4. Chain up 3
5. Create 2nd row of V-stiches
6. Crochet 3 “scales” between the first 4 you created.
Follow steps 2-6 until you have created 7 rows of “scales” beginning and ending with 4 scales. (4,3,4,3,4,3,4)
Use this tutorial on-line for specifics on how to master this stitch.
7. Chain up 3
8. Double crochet in each chain across. You should have 24 double crochet when finished with this row.
9. Repeat #7 and #8 until you have reached your desired length for half of the scarf. I made 60 rows of double crochet.
10. Fasten off.
Repeat to create two “halves” of the scarf.
Finishing:
1. With right sides together, slip stitch halves together in the center of the scarf.
2. Weave in loose ends.
***Note: When I saw how quickly and easily the project came together, I made two more scarves as gifts. This time, they were intended for children so I used brighter, more vibrant colors. I simply switched yarn colors after the crocodile stitch was complete and moved on to the double crochet.
I then added a neat little accent around the circumference of these to tie the project all together. Once you have pieced both side of the scarf together, simply slip stitch around the body of the scarf with the accent yarn you used for the crocodile fringe…. Cute huh?!

That’s awesome! I’ve been wanting to learning, just the basics for now!
LikeLike
I can recommend some books and youtube links on how to learn… upcoming article!!! Thanks for the idea 🙂
LikeLike