
I’m a creature of habit. I have little routines that I look forward to and that bring me joy. My favorite of these is sleeping in and drinking coffee in bed while watching FoodNetwork on Sunday mornings.
Charlie, Max and I have a grand old time just cuddling, napping and caffeinating. My favorite shows are those that show the host in his or her home, preparing a fun meal for the friends that will be coming over to celebrate the event they’re supposedly planning. I sit and fantasize about all the parties I could host and serve this or that dish at or how I could make this dish better or what I would add or omit from the other.
Sometimes, I get ideas for things that have nothing to do with cooking at all, such as decorating, party themes or, as was the case a couple of weeks ago, gardening. One host showed how she used a box frame as a shelf in which she placed her planted herbs. I’ve been ruminating on that one for a while… then Saturday it hit me! Here’s what I came up with 🙂
Materials:
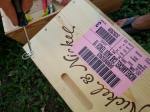
- I went to my local wine superstore and purchased some wooden wine crates for $5 each. Most wine stores either give these away or sell them to patrons who want to use them as gift boxes, etc. You may have to ask a store clerk where they’re located for purchase or if you can just have them for free!
- Variety of potted herbs (I got mine on sale, 5 for $10!)
- clear spray paint with matte or satin finish
- ring hangers, 2 hangers for each planter box.
Here’s how I put it all together:
-

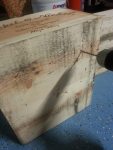
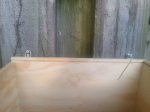
- Step 1: Remove any stray nails or staples on the tops of the wine crates you’ve selected.
-
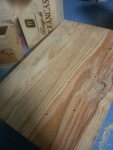
- Step 2: Using an electric drill, create “drainage holes” on the bottom of each crate. For smaller crates I made at least 9 holes and for larger ones I made at least 12.
-
- close-up of holes
-
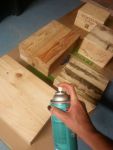
- Step 3: Using a clear, matte or satin finish spray, lightly cover boxes so that they are protected (if only slightly) from the elements.
-
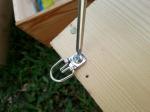
- Step 4: Attach ring hangers to the top back of each box. Make sure you identify which side of the box is least attractive and use this as the back.
-
- Close-up of attached ring hangers.
-
- Step 5: Using a level, place screws into fence or wall onto which you would like to hang your wine crate herb planter.
-

- Space out evenly and attractively.
-
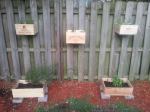
- Step 6: Unhook from wall once you’re happy with they way they look, fill with herbs then re-hang. Rather than hang the larger boxes, I elevated them on brick pavers so that they could drain.